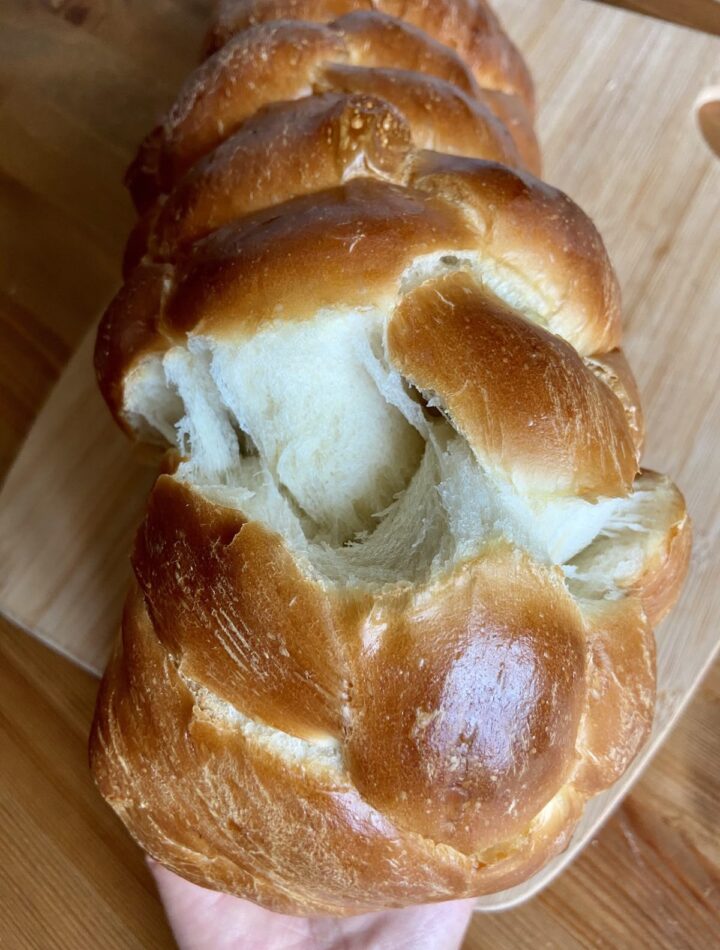
Homemade sourdough challah bread combines the rich tradition of challah with the deep flavor and natural fermentation of sourdough. This beautiful braided loaf is soft, fluffy, slightly sweet, and wonderfully aromatic. Unlike commercial yeast challah, sourdough challah develops a more complex taste while maintaining the tender crumb and golden crust that make challah so beloved.
Perfect for family dinners, sandwiches, French toast, or holiday celebrations, this sourdough challah recipe creates a bakery-quality loaf with a pillowy texture and stunning appearance. While it requires patience for fermentation, the results are absolutely worth the effort.
Why You’ll Love This Recipe
- Naturally leavened with active sourdough starter
- Soft and fluffy interior
- Beautiful golden braided crust
- Slightly sweet flavor
- Perfect for special occasions and everyday enjoyment
- Stays fresh longer than conventional bread
Preparation Time
- Active preparation: 45 minutes
- First fermentation: 6–8 hours
- Cold proof (optional): Overnight
- Final proof: 2–3 hours
- Baking time: 35–40 minutes
- Total time: Approximately 10–14 hours
Ingredients
For the Dough
- 150g active sourdough starter (100% hydration)
- 500g bread flour
- 2 large eggs
- 180ml warm water
- 60g honey
- 50g unsalted butter, softened
- 10g salt
For the Egg Wash
- 1 egg
- 1 tablespoon water
Optional Toppings
- Sesame seeds
- Poppy seeds
- Everything bagel seasoning
Equipment Needed
- Large mixing bowl
- Kitchen scale
- Dough scraper
- Plastic wrap or damp towel
- Baking sheet
- Parchment paper
- Pastry brush
Step 1: Prepare the Sourdough Starter
Begin with a healthy, active sourdough starter. Feed your starter 4–6 hours before mixing the dough. It should be bubbly, doubled in size, and pass the float test.
A strong starter is essential for achieving the light and fluffy texture characteristic of challah bread.
Step 2: Mix the Dough
In a large mixing bowl, combine:
- Active sourdough starter
- Warm water
- Honey
- Eggs
Whisk until smooth.
Add the bread flour and mix until a shaggy dough forms. Let the mixture rest for 20–30 minutes. This resting period, known as autolyse, helps hydrate the flour and improves gluten development.
After resting, add the softened butter and salt.
Knead the dough for 10–15 minutes by hand or 8–10 minutes using a stand mixer. Continue until the dough becomes smooth, elastic, and slightly tacky.
The dough should pass the windowpane test, meaning it can stretch thinly without tearing.
Step 3: Bulk Fermentation
Place the dough in a lightly greased bowl and cover.
Allow it to ferment at room temperature for 6–8 hours, depending on the temperature of your kitchen and the strength of your starter.
During the first 2 hours, perform three sets of stretch-and-folds every 30 minutes:
- Gently pull one side of the dough upward.
- Fold it toward the center.
- Rotate the bowl and repeat on all sides.
These folds strengthen the dough and improve the final texture.
By the end of bulk fermentation, the dough should appear puffy and increase noticeably in volume.
Step 4: Cold Fermentation (Optional)
For enhanced flavor and easier handling, place the covered dough in the refrigerator overnight.
Cold fermentation deepens the sourdough flavor while making the dough firmer and easier to braid.
If you’re short on time, you can skip this step and proceed directly to shaping.
Step 5: Shape the Challah
Transfer the dough onto a lightly floured surface.
Divide it into either:
- 3 equal pieces for a simple braid
- 4 or 6 pieces for a more decorative loaf
Roll each piece into a rope approximately 14–16 inches long.
Pinch the ends together and braid the ropes carefully.
Once braided, tuck the ends underneath the loaf to create a neat appearance.
Place the shaped challah on a parchment-lined baking sheet.
Step 6: Final Proof
Cover the braided loaf loosely with plastic wrap or a clean kitchen towel.
Allow it to proof for 2–3 hours at room temperature.
The loaf should become noticeably puffy and airy. When gently pressed with a finger, the dough should slowly spring back.
Avoid over-proofing, as this can cause the braid to lose definition during baking.
Step 7: Apply Egg Wash
Preheat your oven to 375°F (190°C).
Whisk together:
- 1 egg
- 1 tablespoon water
Brush the entire loaf generously with the egg wash.
For extra shine and color, wait 5 minutes and apply a second coat.
Sprinkle with sesame seeds, poppy seeds, or your preferred topping if desired.
Step 8: Bake the Challah
Bake in the preheated oven for 35–40 minutes.
The challah is ready when:
- The crust is deep golden brown
- The loaf sounds hollow when tapped underneath
- The internal temperature reaches approximately 190°F (88°C)
If the loaf browns too quickly, loosely cover it with aluminum foil during the final 10–15 minutes of baking.
Step 9: Cool Completely
Transfer the baked challah to a wire rack.
Allow it to cool for at least one hour before slicing.
Cooling helps the crumb finish setting and prevents the bread from becoming gummy.
Serving Suggestions
This fluffy sourdough challah is delicious:
- Served warm with butter
- Used for French toast
- Made into gourmet sandwiches
- Paired with soups and stews
- Served alongside holiday meals
Its rich flavor and soft texture make it suitable for both sweet and savory applications.
Storage Tips
- Store at room temperature in an airtight container for up to 4 days.
- Refrigerate for up to 1 week.
- Freeze slices or the whole loaf for up to 3 months.
To refresh, warm slices briefly in a toaster or oven.